We are excited that you will be using EmailReseller's secure email services. A few steps need to be taken to get you off to a good start and ensure a seamless transition. You can easily do these steps yourself, but if you still need help, please contact us, and we will carry out the migration for you. Completely free of charge because we are happy that you become our customer.
First of all, add the domain name you want to use. This can be an existing domain name or a new domain name. To configure your domain name to use EmailReseller's email services, you must be able to change the DNS zone records at your registry. The registry is where you registered your domain.
In the EmailReseller dashboard, choose "manage email" and "add domain".
Enter the domain name without www and without protocols such as http or https.
After adding the domain name, we do not change the DNS settings; we will do that later when we are completely ready.
 add domain to emailreseller
Now we add one or more e-mail accounts to the domain name we just added.
Click on "manage e-mail" under "e-mail options" and then "add e-mail account". Add the existing email account and choose a password that complies with the policy or let us generate one. Select the plan you want to link to this email account and click the “add account” button.
 add e-mail account
We have now added the domain name and created the email account(s). It is time to migrate the existing email to the new mailbox at EmailReseller.
Go to “imap sync” in the dashboard and fill in the mail server information of your current email provider (source), and on the right, enter the data in the email account that you have just added to EmailReseller (target).
The fields required are:
 imap sync migration screenshot
The way we can connect to the source mail server, SSL, is preferred, then a secure connection is built between the source mail server and the target mail server. If you use a mail server with SSL but without a valid certificate, you can choose ssl/no-validate-cert.
The mail server's name, e.g., mail.domain.com, replaces domain.com with your domain name.
Select the correct port for SSL (Secure Socket Layer), which is 993, and if you use IMAP without SSL, then the current port is 143
The username you use to read the email
The password you use to read your mail.
If you want us to do the migration for you, that is the data we need. If you send it right away, we can get started for you immediately.
Also, fill in the correct data at the target, we at EmailReseller always use the SSL protocol, and you can see the incoming server name under "edit email" in the dashboard behind the email account you just created. Click on the "Add Sync task" button.
The migration task is now scheduled and will be picked up by the migration server very soon. As long as your task is still open, you cannot add another task. You will also see a notification that your migration task is still pending.
When the migration is completed, you will receive a migration report in your mailbox. You can check the migration by logging in to webmail with the account details you created at EmailReseller. You can reach our innovative web based email at the following url https://webmail.emailreseller.com
We can change the DNS settings if everything has been transferred as desired.
In the dashboard, choose "manage email," then "view domains," and then click on "DNS settings". There are 3 important settings we need to make in your domain name's records in the registry.
We need to change the MX records; with this change, you will actually use the email capabilities of EmailReseller. Well, DNS changes on the internet are not immediately active, so it is possible that during this day, you will receive an email from your old provider as well as at EmailReseller. There is nothing we at EmailReseller can do about this. This is how the internet (DNS = domain name system) is built.
With the MX records, we indicate who is responsible for handling the email on your domain. So this will be EmailReseller. The yellow section indicates which change you need to make—a short explanation @ stands for yourdomain.com. IN MX, this is the type of record and then the priority. The lower the number, the higher the priority, so we have specified a priority of 10 and, finally, the mail server name responsible for receiving the email.
This is not the same as the mail server name (target) we used in the migration task. This mail server checks all incoming emails to see if they are safe (Spam, viruses, dangerous files).
Enter an SPF record. The SPF record is needed for receivers to determine which mail servers can send emails on your domain's behalf. The @ (at)sign stands for the domain yourdomain.com
This long string is a public key of a private key that we automatically generated when you added your domain name. This public key ensures that all email from yourdomain.com really comes from your domain name. In this way, we prevent abuse, consciously and unconsciously, on your domain's email.
If all settings are set correctly, you can make optimal use of the email service at EmailReseller. The chance that your email will disappear into the junk email folder will also be minimal.
To simplify setting up your e-mail program, we add 2 DNS records. These DNS records ensure that after entering your e-mail address, the e-mail program automatically retrieves and configures the correct settings from EmailReseller.
autodiscover IN CNAME autodiscover.emailreseller.com._autodiscover._tcp IN SRV 10 10 443 autodiscover.emailreseller.com.
Check out the support page to set your preferred email program for reading and sending emails at EmailReseller.
The migration has been completed. The advice is to check the email with the old email provider for 24 hours, for example, via the webmail of this email provider. I would also like to point you to the support page to set up the calendar, tasks, and contacts. Please let us know if there are any recommendations about this migration guide.
We at EmailReseller look forward to a joyful collaboration.
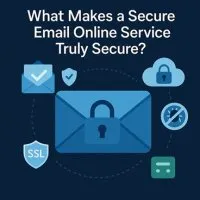
You THINK your email is safe… but is it really? Most people assume that as long as they have a “strong password,” their inbox is secure. But the truth? Passwords ar..
03-10-2025 0 comments![]() © 2022 - 2025 HostingBe.com Simple CMS versie 3.1.0
© 2022 - 2025 HostingBe.com Simple CMS versie 3.1.0